One of the popular techniques of sighting in a bow is to ensure that you shoot groups of arrows at one spot on a target. By so doing, you will discover where your arrow land and then adjust the windage and the elevation based on that.
Make sure you repeat this process several times until you are able to get tight groups. With this method, you can be a pro but have in mind that it is not the easiest way to sight in a bow. Let us assume that the easiest way is to break this kind of process into smaller stages.
By so doing, you will be able to focus on a thing per time rather than just going after many things per time. If can do this, you will be able to have more accurate sight.
Archery Sight Adjustment Chart
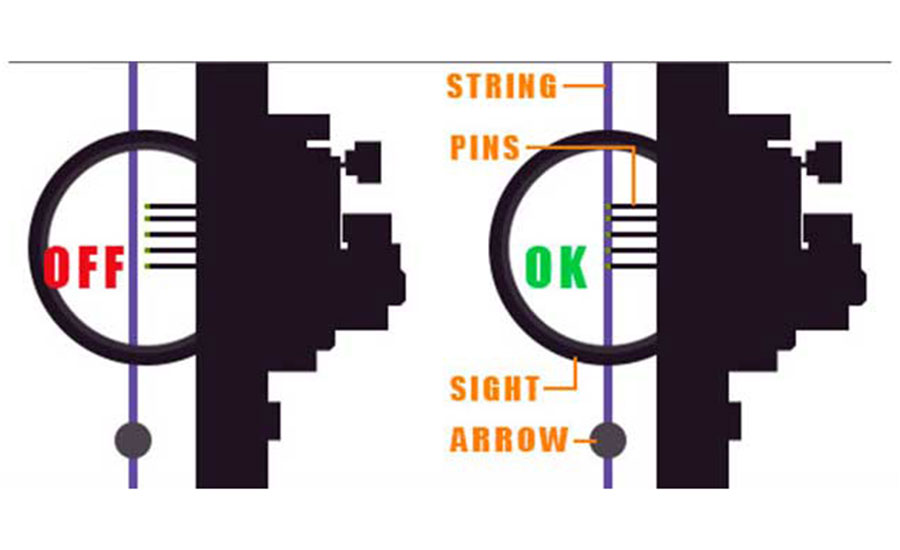
Windage
- Adjust your Pins with the Center Shot: To start with, adjust your pins with the center shot of your bow. This will not make you perfect but rather will prevent any wild right or left misses.
- Put a vertical masking strip tape across your target center and aim at the tape so as to get the sight aligned with right and left.
- Start Up Close: It is advisable to starting up close to ensure that your first shots land on the target. For instance, 10 yards is very close enough hence, make any rough alignments you will require prior shifting back to 20 yards.
- Ensure that you spend enough time required at 20 yards if you want all your arrows to hit the masking tape. Try as much as possible not to bother about the elevation alignments at this moment but only right and left. When your arrows are hitting to the left of the tape, shift your pin left. But when your arrows are hitting to the right of the tape, shift your pin right. If you are able to get all your arrows to hit the tape, you can move to the next step.
- It is very common among the shooters to align the 2nd axis after sighted in approximately at 20 yards prior shifting out to further distances. The reason why this is preferred is that it will have the great effect on your groups when you are between 50 and 60 yards. Then, you can easily sight in 3rd axis or better still save it till later. But if your sight did not have these alignments, you can skip this step.
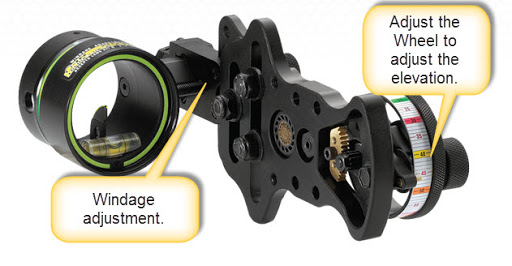
Elevation
This kind of elevation adjustments could be a little bit different based on the type of sight you have. Meanwhile, the fundamental strategy is the same.
- Move out the vertical strip of the tape from your target and include a fresh horizontal tape so that your elevation can be sighted in. the major reason for this step is to get all your arrows hitting the horizontal line. The lefts and rights have been concluded for now.
- Begin from 20 yards. When your arrows are hitting above the tape, you can adjust your sight up. But if the arrows are hitting under the tape, the sight or pin is adjusted down. Make sure you carry out this process severally as this will enable you to get all your arrows hitting the tape.
- Ensure you repeat the previous step while moving further as you increase your target by 10 yards. The number of times you carry out this process will be based on the number of pins and the type of sight you are having on your bow.
- Single Pin sights: All you need is just to follow the instructions in the manual strictly. Generally speaking, you will have to sight in at 20 yards and one other distance which is always 60 yards.
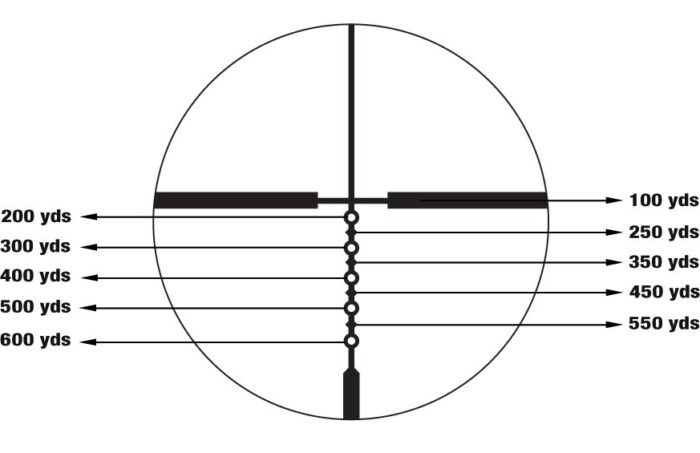
- Multi-Pin Sights: make sure you sight in the elevation for each of the pins and the number of times you carry out this process will be based on the number of pins you are having on your bow.
- Multi-Pin Moveable Sights: first and foremost, sights in each of the pins before you use the bottom pin as your rover for the long-distance shots. For instance, you can sight in at 20, 30, and 40 yards with 3 pins. Then, use the bottom pin for all those shots that are more than 40 yards. By so doing, the pin will let you get the ranges beyond 100 yards in a normal way.